PaperScorer How-To Guide: Scanning and Uploading Student Answer Sheets
Project Brief
- Audience: Teachers using PaperScorer for grading (spec work).
- User Goal: To scan and upload student answer sheets to the PaperScorer application.
- Problem: The procedure is complex, and there are many failure points.
- Scope: This guide covers a recommended method for scanning and uploading large batches of sheets in detail and briefly mentions alternatives.
-
Key Considerations:
- Guide is scoped to scanning and uploading assessments, not creating assessments, to avoid overwhelming the user.
- An alternative method for scanning and uploading student answer sheets is mentioned but not described in detail to avoid overwhelming the user.
- Guide distinguishes between problems teachers can resolve themselves and problems that warrant escalation.
- Success Criteria: Teachers can scan and upload sheets to PaperScorer in less than 20 minutes while correcting all errors.
- Validation: Test with first-time users against the success criteria.
Sample
This how-to guide explains how to scan and upload student answer sheets to PaperScorer. Meant for non-technical users, this guide shows how to accomplish this task quickly and efficiently, leaving more time for grading.
Prerequisites
- An assessment created in PaperScorer and corresponding student answer sheets printed out.
- A scanner/copier or a mobile phone with a camera. If using a mobile phone, download the PaperScorer app from the App Store (iOS) or Google Play (Android). A scanner/copier is recommended for large batches of sheets.
- If using a scanner/copier, a USB drive is required if the scanner/copier cannot email files directly.
Preparation
First, make sure the student answer sheets are ready to be scanned.
- Ensure the student answer sheets are rotated the same way as each other.
- Check for any folds and unfold any you find.
- Check for stray markings, which may affect processing. Erase the stray markings or proceed and correct errors later.
- If sheets are excessively ripped or otherwise damaged, they may need to be pulled out and graded manually.
Scanning
PaperScorer provides two different methods for scanning student answer sheets. The scanning method described below is recommended for large batches of sheets such as those from a class. The other method and its limitation are mentioned briefly at the end of this section.
Recommended Scanning Method for Large Batches
This scanning method uses a scanner/copier to create a PDF or JPEG of the sheets. There are two different versions of this method, which are described below. For both versions, use the scanner/copier settings provided in the following table.
| Setting | Value |
|---|---|
| File Format | PDF or JPEG (use PDF for large batches) |
| Max File Size | 250 MB |
| Color | Grayscale |
| Resolution | 300 DPI |
| Orientation | Any (consistency makes processing marginally faster) |
| Mode | Single Page/Simplex |
USB Drive Version
- Insert the USB drive into the scanner/copier.
-
Place the sheets in the feeder on top of the scanner/copier.
Tip: Sheets do not need to be sorted by section. You can enter all class sections as a single stack and the application will sort by section later.
- Select Scan to USB in the scanner/copier’s user interface. The exact wording and procedure may vary by model. Use the scanner/copier settings in the table above.
- The scanner/copier will process the sheets and save the file to the USB drive.
- Once the file is saved to the USB drive, you are ready to upload the file to PaperScorer. Go to the Uploading section below for instructions.
Email Version
-
Place the sheets in the feeder on top of the scanner/copier.
Tip: Sheets do not need to be sorted by section. You can enter all class sections as a single stack and the application will sort by section later.
- Select Email in the scanner/copier’s user interface. Enter your own email address as the recipient email address. The exact wording and procedure may vary by model. Use the scanner/copier settings in the table above.
- The scanner/copier will process the sheets and email the file to your email address.
- Once you receive the file by email, you have two options:
- Save the file to a location on your computer. Once the file is saved to your computer, you are ready to upload the file to PaperScorer. Go to the Uploading section below for next steps.
- Forward the email with the attachment included to
scan@paperscorer.com. PaperScorer will automatically process the attachment. Make sure you forward the email from the email address associated with your PaperScorer account. Go to the Uploading section below for next steps, but skip steps 3–6.
Caution: PaperScorer does not currently support emailing the file directly from the scanner/copier to PaperScorer.
Mobile Option (Summary Only)
Open the PaperScorer mobile app and center a single sheet in the camera viewfinder on the screen. The app will then automatically take a photo of the sheet and upload the data.
Caution: This method requires processing sheets one by one. For large batches, use the method described above.
Uploading
To upload the file to PaperScorer, follow these steps:
-
Navigate to
https://www.paperscorer.comin your browser and click Log In.
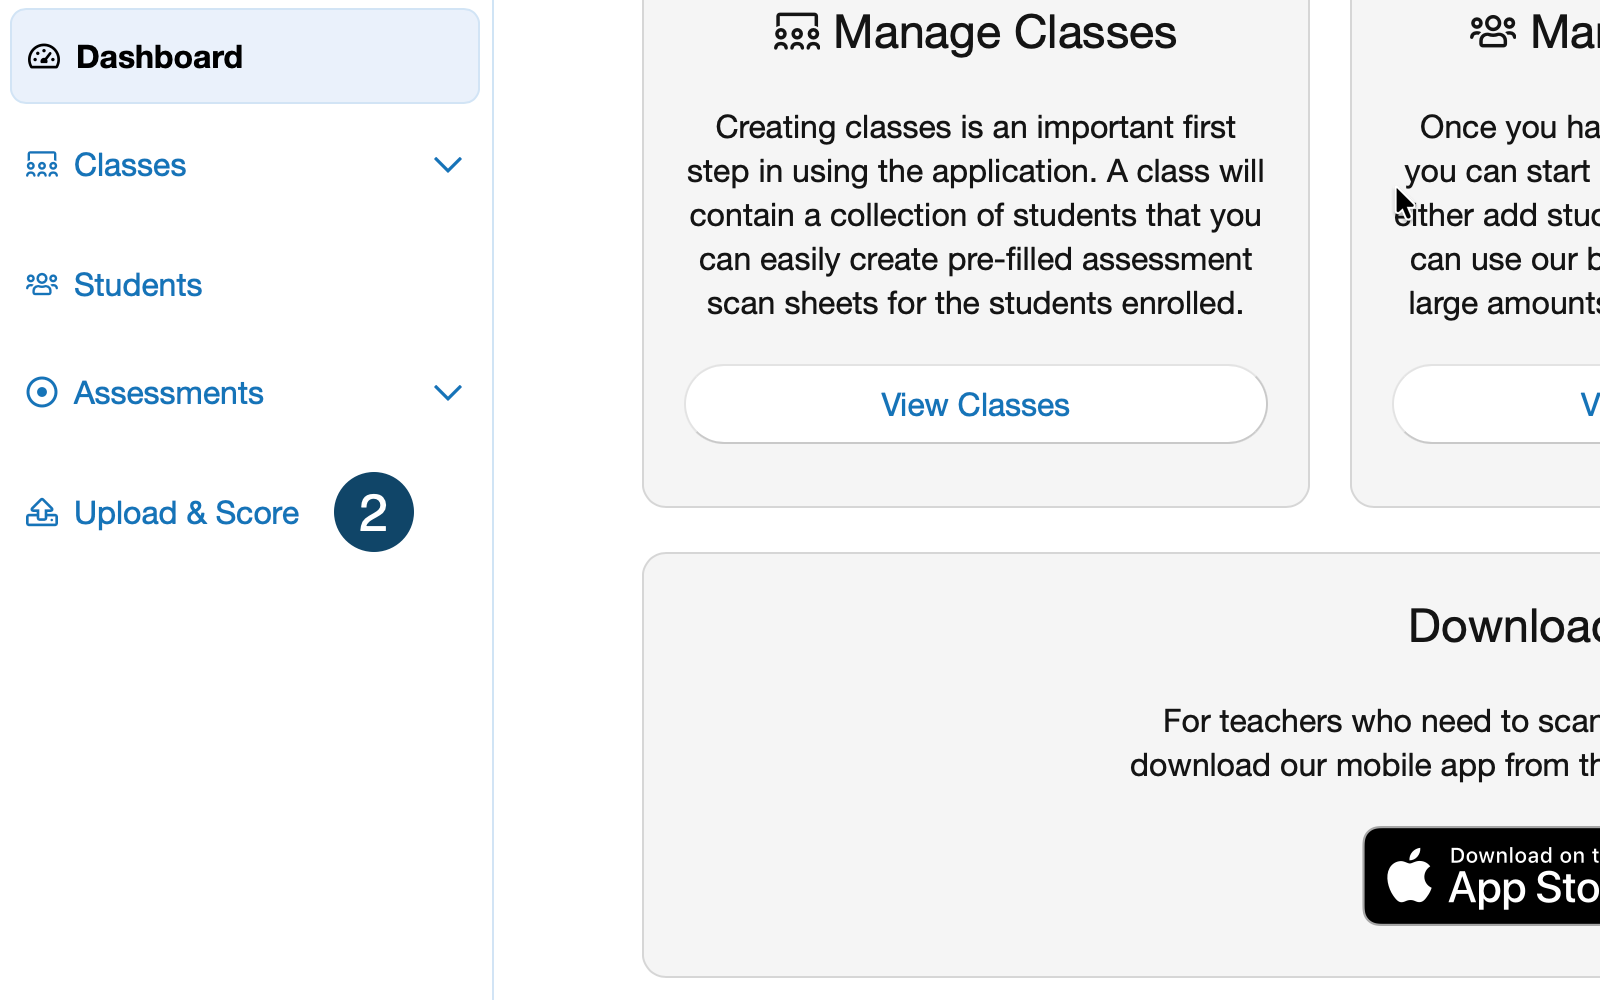
-
Click Upload & Score.
-
Click Browse Files.
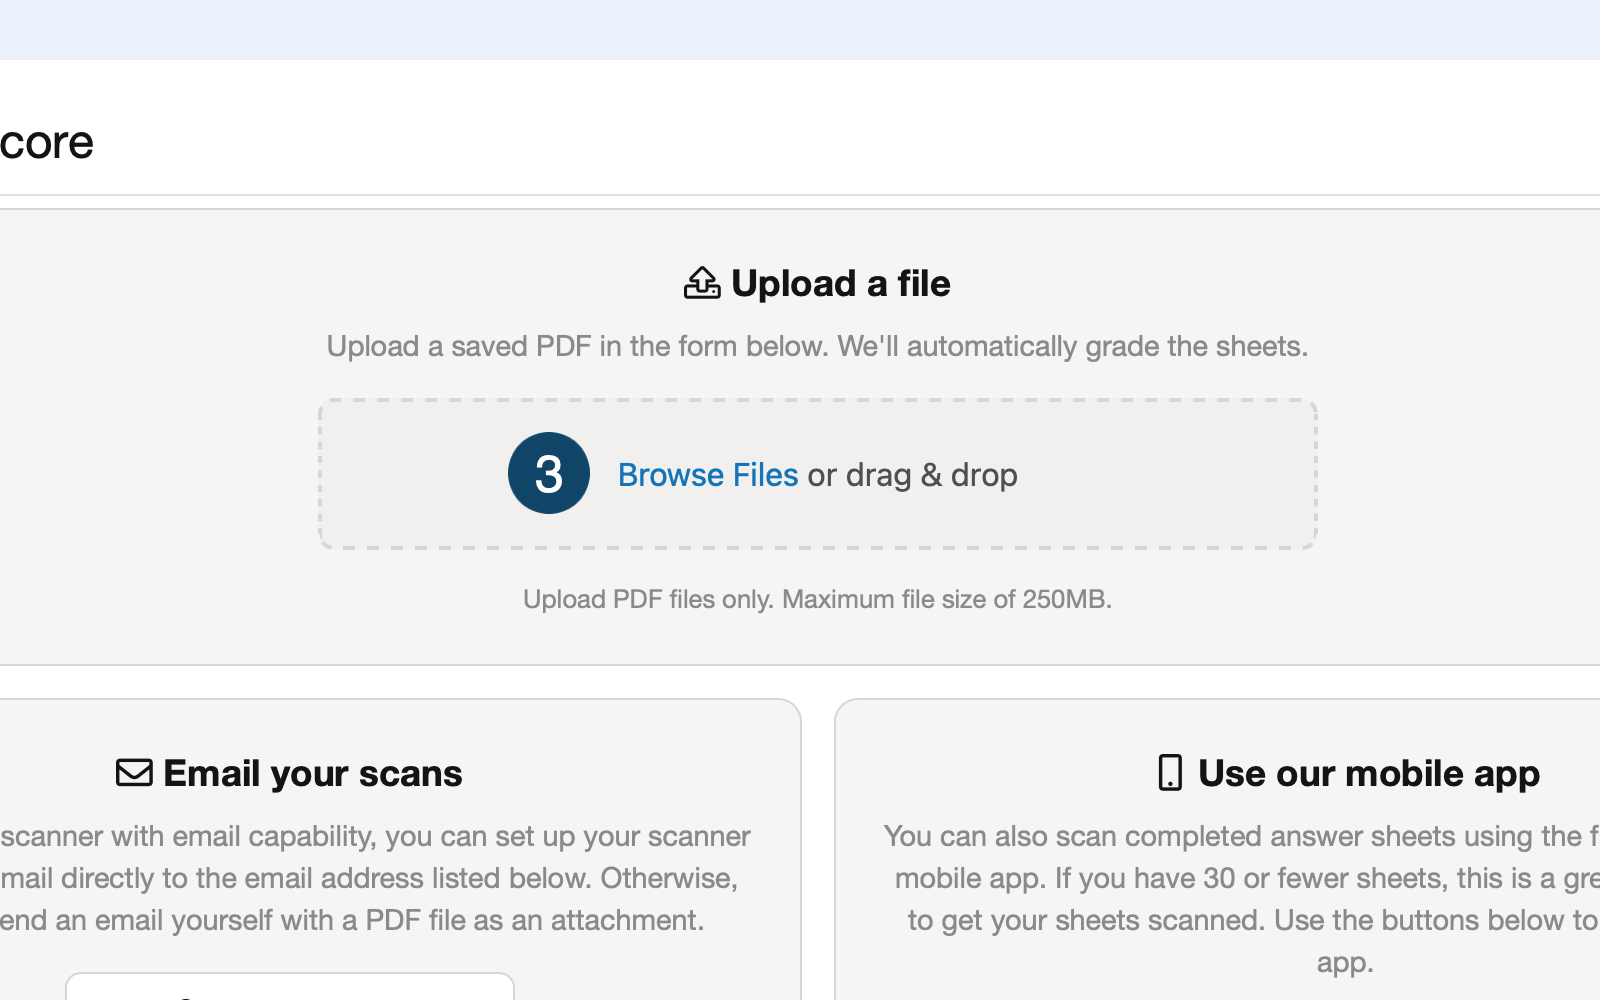
- Select the file in the file picker.
- Click Upload.
- You will see Processing. Processing may take 5–10 minutes or more depending on file size.
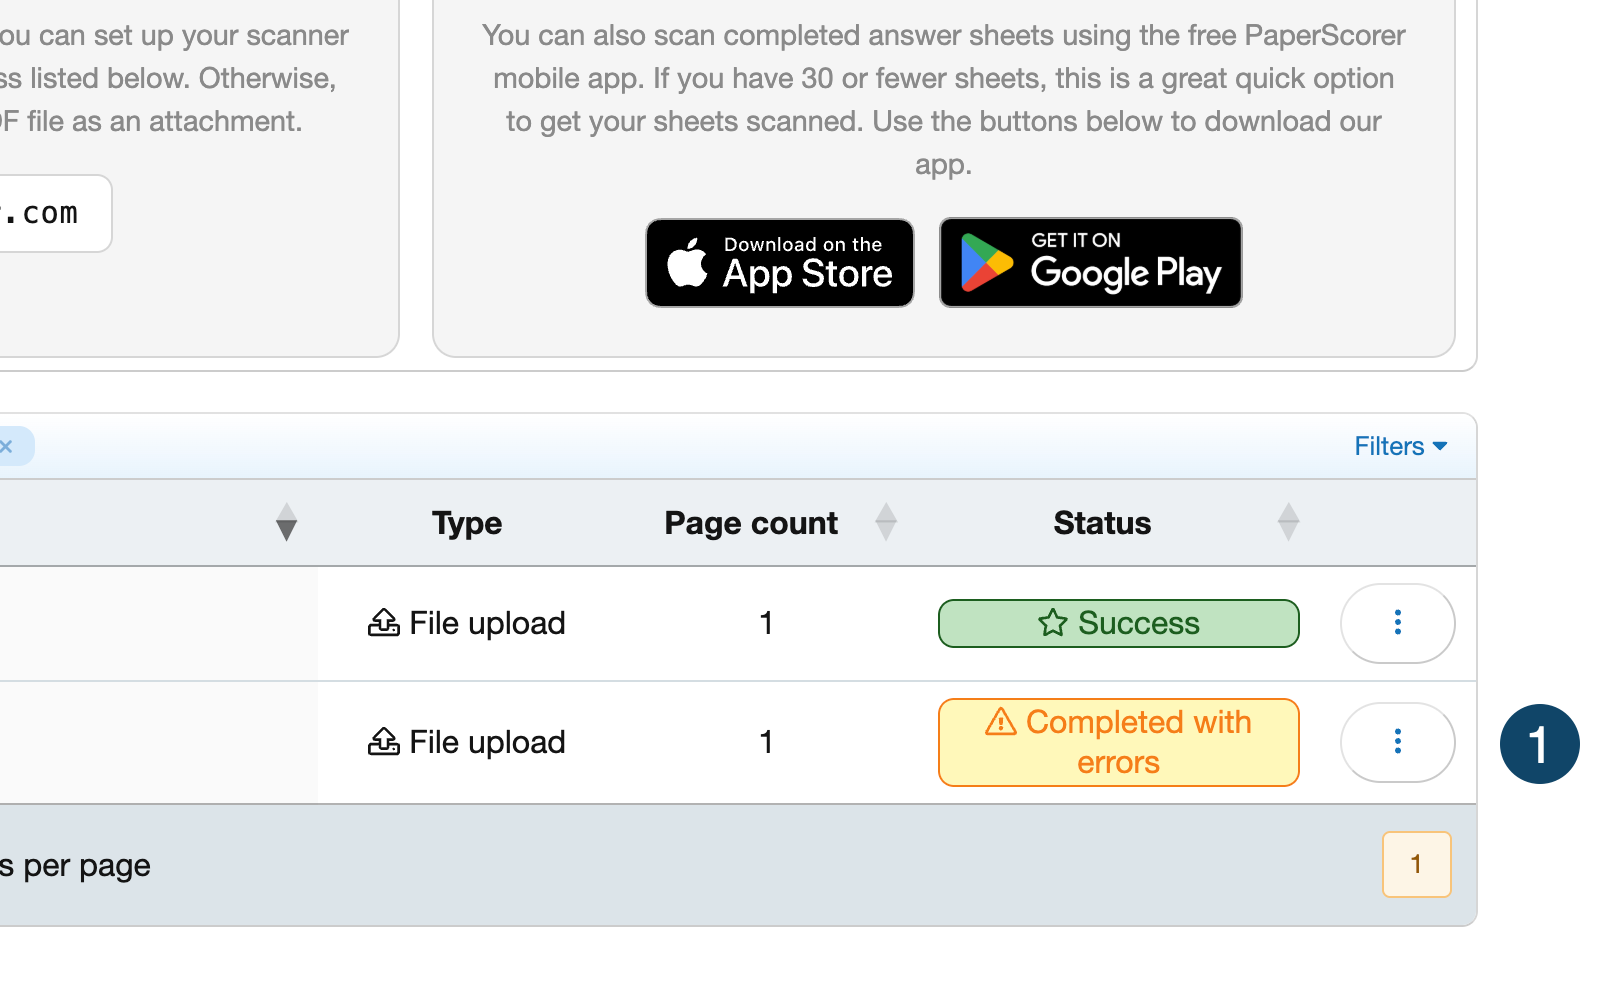
-
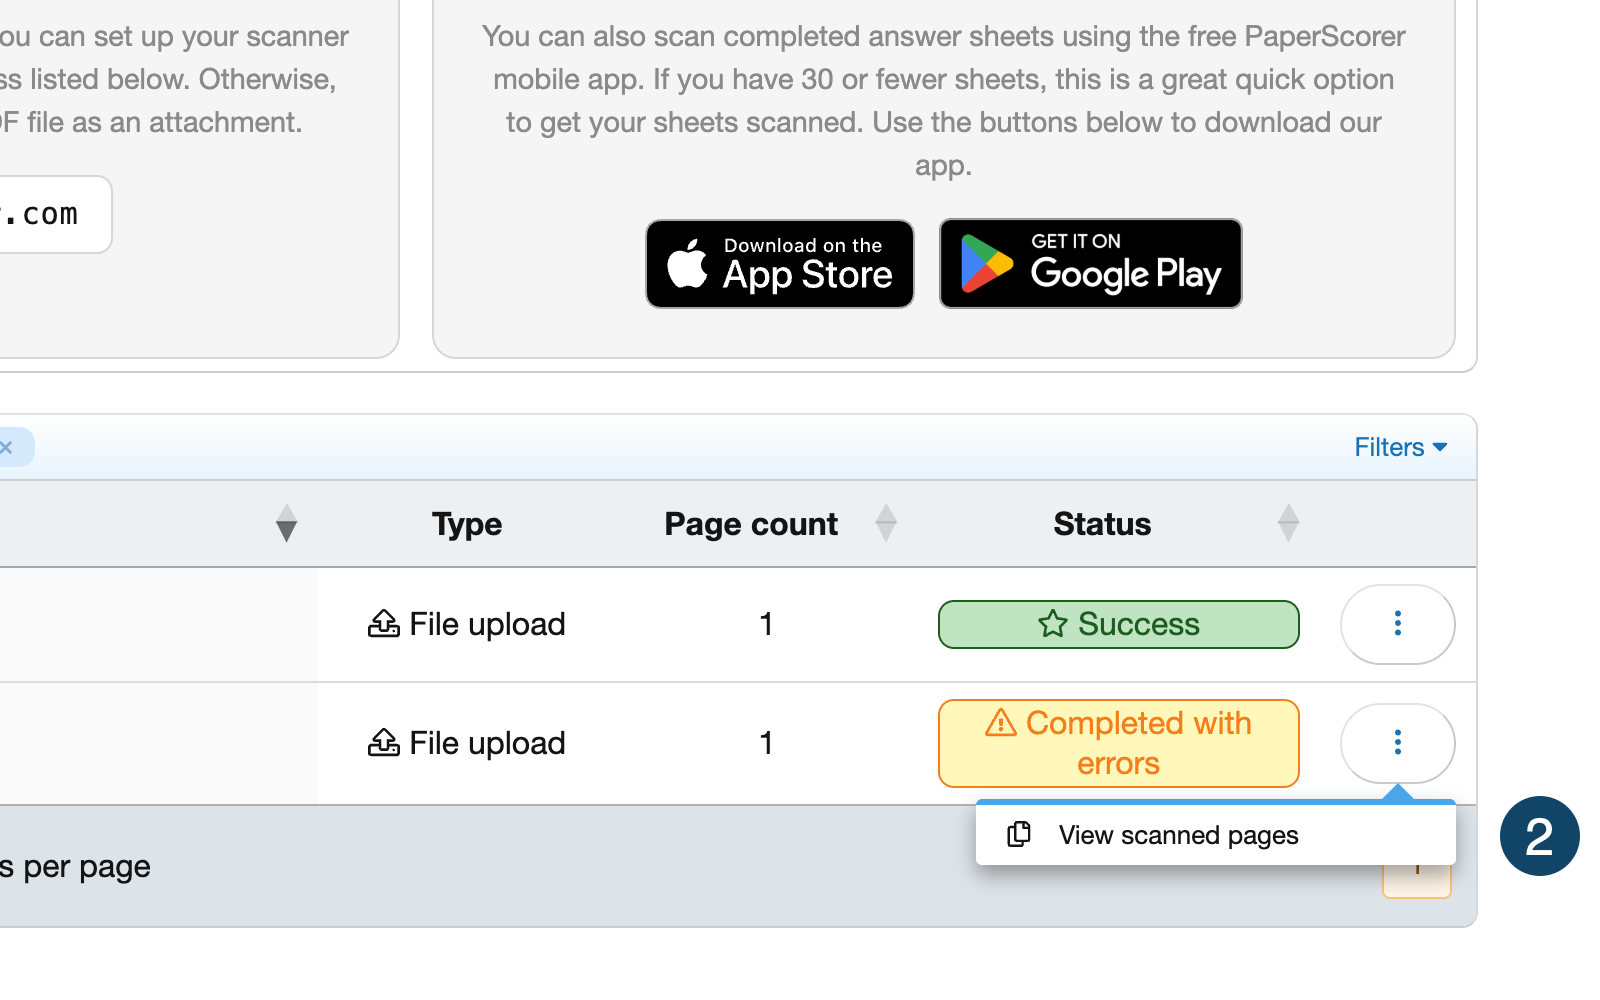
Once processing is complete, you will see either Success or Completed with errors.

- If the result is Success, you are ready to grade the sheets. If the result is Completed with errors, you must correct the errors as described in the following section. Once errors are corrected, you are ready to grade the sheets.
Correcting Errors
To correct errors, follow these steps:
-
Click the More options button to the right of the status notification.
-
Click View scanned pages.
-
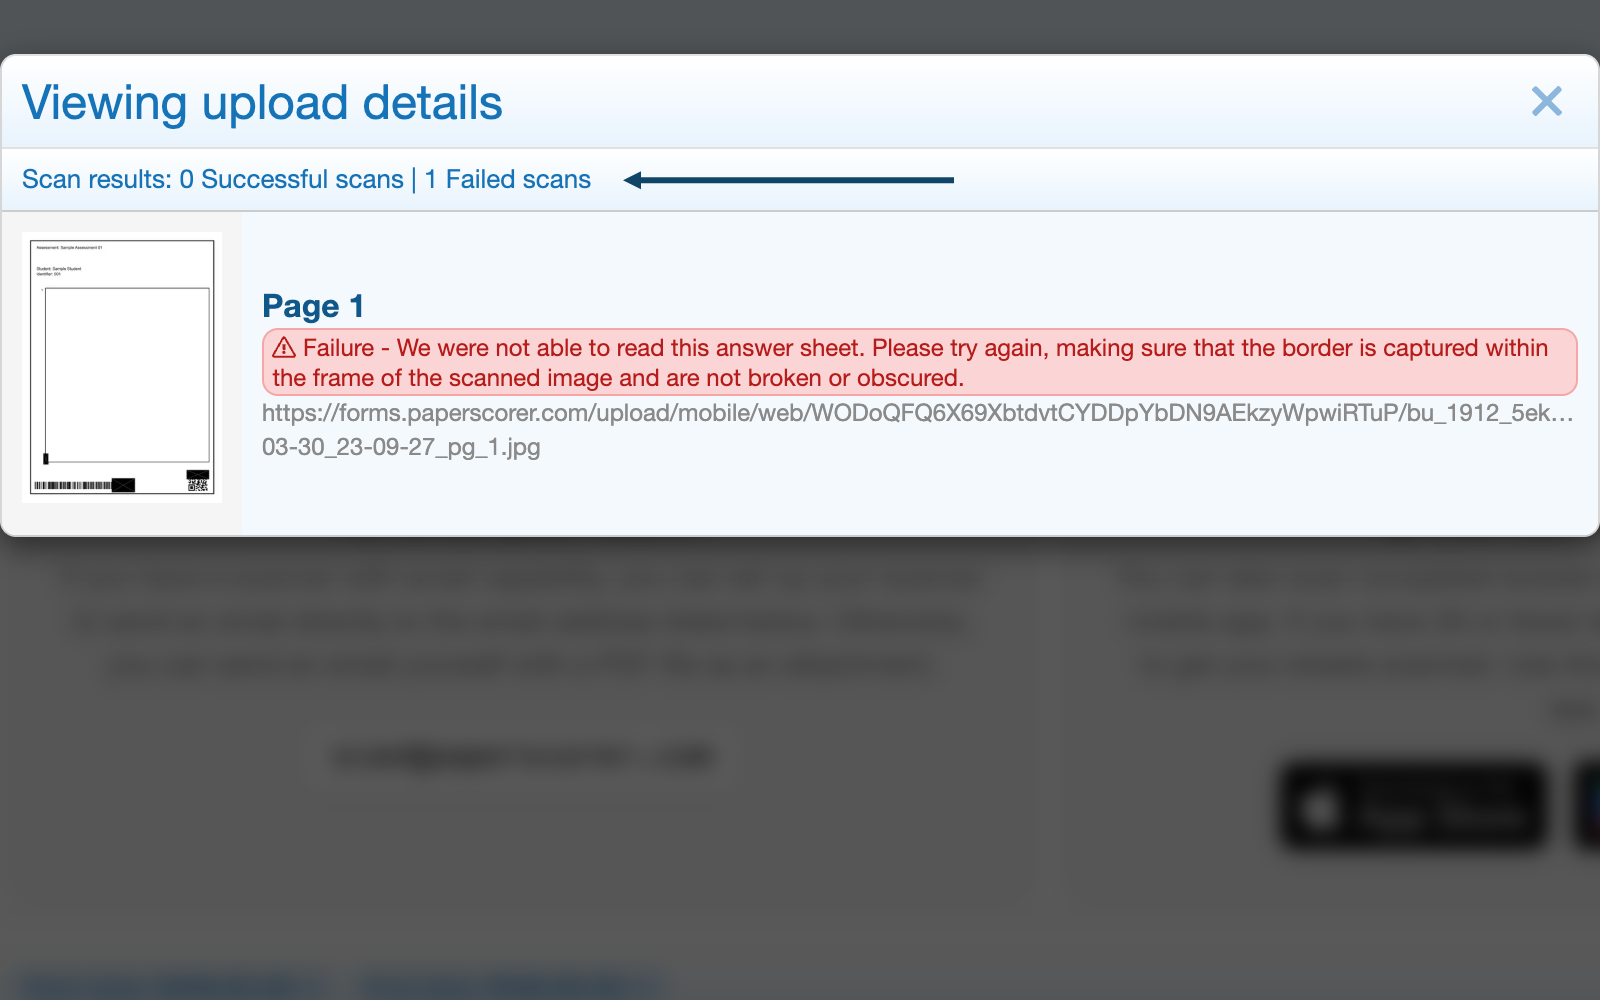
You will see a breakdown of how many sheets were processed successfully and how many failed.
-
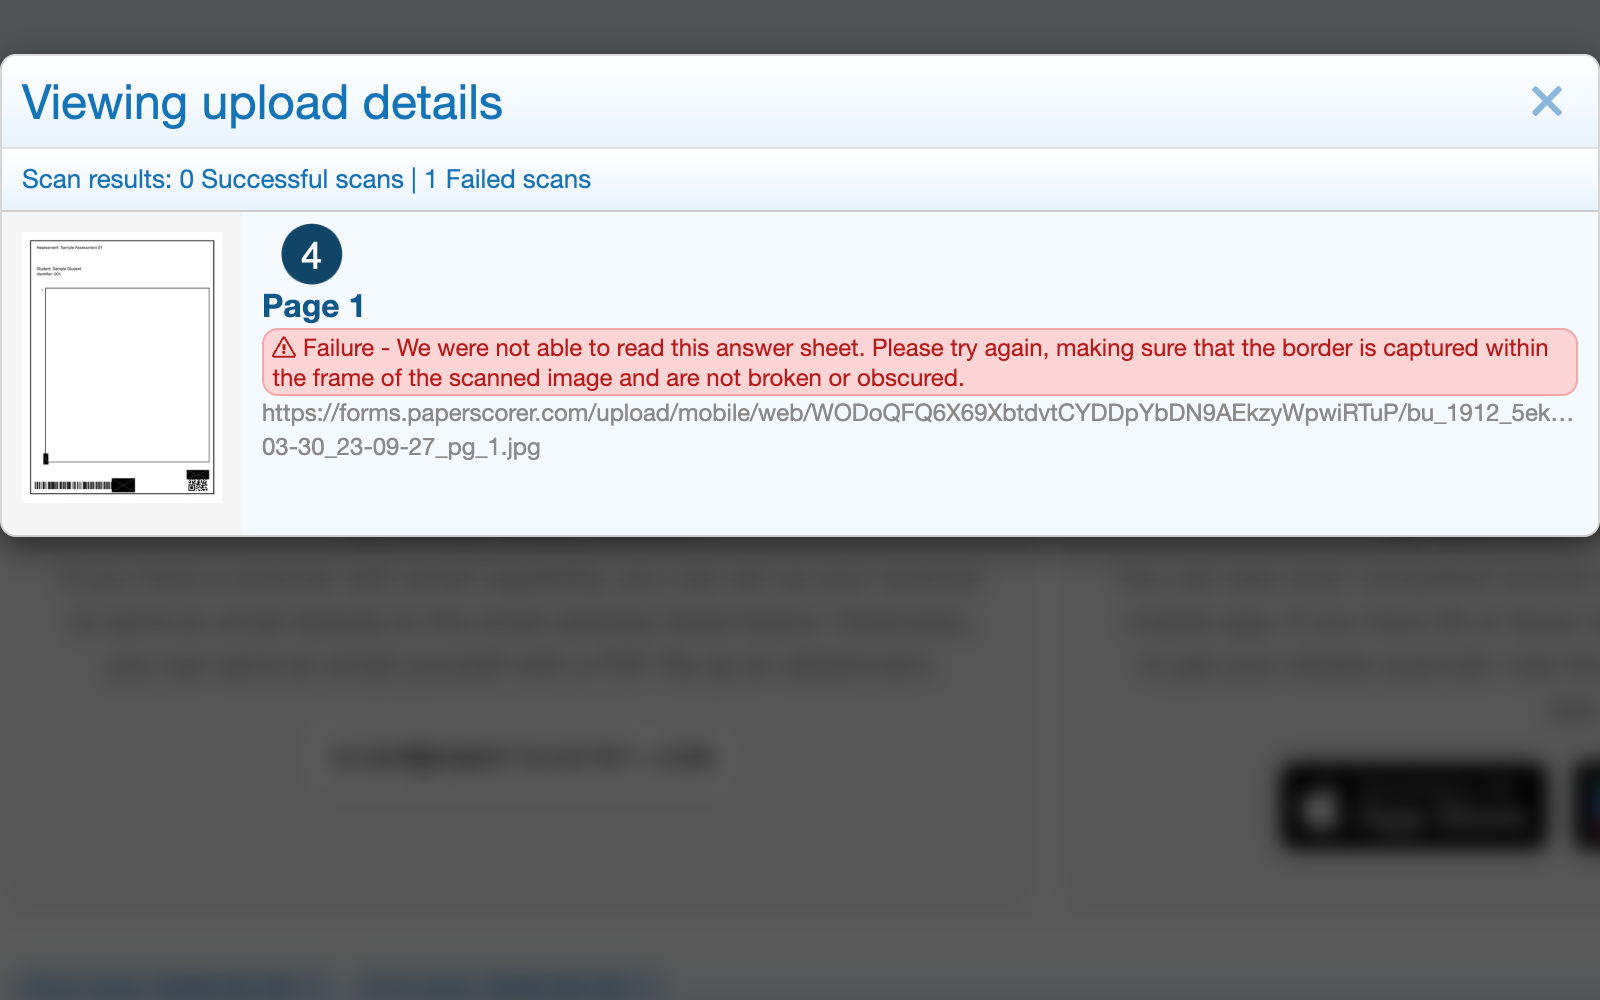
To correct failed sheets, you must first identify them. Scroll down and find the sheets that have a red status notification. Click the page number indicating the sheet you want to view.
-
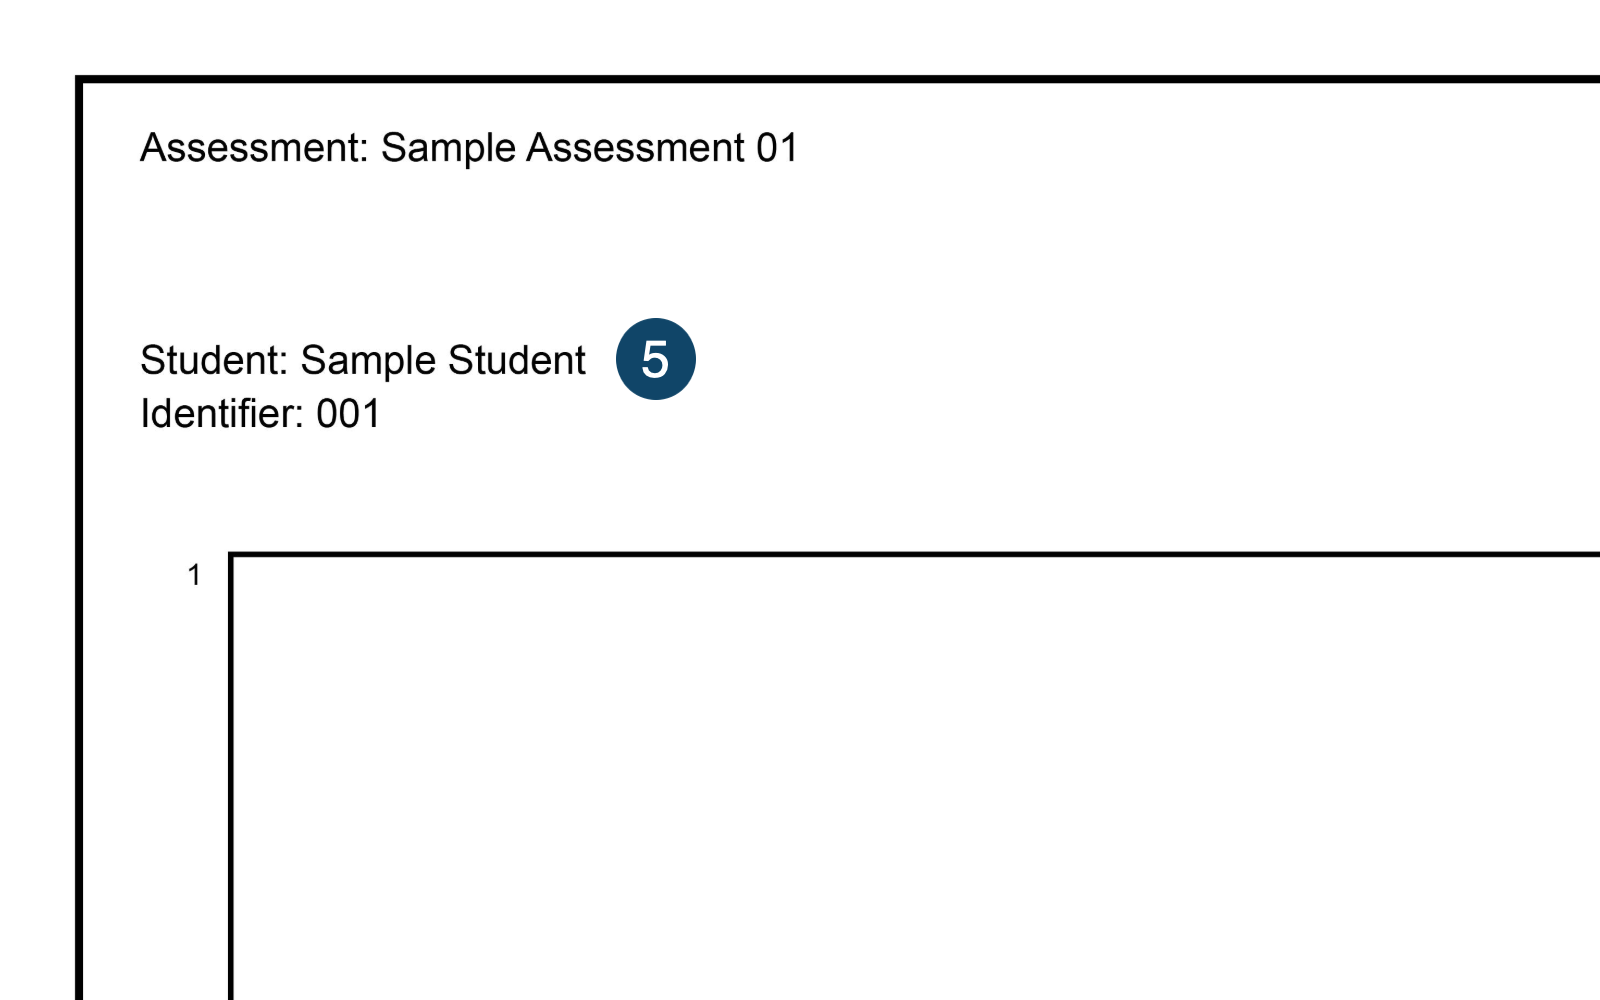
Once you click the page number, note the name of the affected student.
-
Repeat until all failed sheets have been identified.
-
Pull out the failed sheets from the paper stack. These failed sheets must be rescanned.
Tip: For a small number of failed sheets, using the PaperScorer mobile app to rescan is quick and easy.
-
If the failed sheets rescan without issue, you are ready to begin grading. If the failed sheets continue to fail, either grade the sheets manually or try to correct the sheets by erasing any stray markings and unfolding any folds you find. In some cases, manual grading may be necessary.
Troubleshooting
Quick Checks (60 Seconds)
- Open the file locally and make sure it matches the physical sheets (not blank or cropped).
- If the website appears stuck, wait 1–2 minutes and refresh the page.
- If the issue persists, switch to a different browser or use incognito/private mode.
Common Issues
| What You See | Likely Cause | What to Do |
|---|---|---|
| File is grayed out in the file picker | Wrong file format | Make sure file is PDF or JPEG. |
| File upload is rejected with a red banner | File too large | Make sure file is 250 MB or smaller. |
| Upload appears stuck on processing | Large file | Processing times of 5–10 minutes or more are normal for large files. If needed, upload file again. |
| Status shows Completed with errors | Stray markings, paper folds, damaged paper | Pull out affected sheets, correct problems if possible (for example, erase stray markings), rescan (described in detail above). If needed, grade affected sheets manually. |
Direct email from scanner/copier to scan@paperscorer.com does not post anything |
Email must come from email address associated with PaperScorer account | Use the scanner/copier to email the file to the email address associated with your PaperScorer account and then forward the email to scan@paperscorer.com. |
| Mobile app scan fails | Stray markings, paper folds, damaged paper, glare from overhead lights interferes with scan | Check physical sheets for damage/errors, fix (for example, erase stray markings), and rescan. Scan in an environment protected from glare, such as under a table or desk. If needed, grade affected sheets manually. |
When and How to Escalate
When to Escalate
Consider escalating if:
- Multiple users encounter the same issue (may be a service issue).
- Uploads fail across different browsers, different files, or different scanners/copiers.
- Scanning and uploading a teacher-produced test batch does not succeed.
How to Escalate
- For PaperScorer issues, contact PaperScorer directly.
- For internal IT issues, contact the IT helpline at
(000) 000-0000. - For larger school issues, contact the Dean of Academics at
(000) 000-0000 Ext. 0ordeanofacademics@example.com.
Tips
-
Have students use No. 2 pencils when completing student answer sheets. No. 2 pencils reduce the risk of scanning issues. Consider giving students pencils to make sure they use the correct type.
-
Carrying a stack of sheets around prior to scanning them increases the risk of scan issues because the paper can become damaged. Consider scanning sheets soon after receiving them.
-
If a small number of sheets fail to process, it is often quicker to grade manually than troubleshoot.
Student Privacy
- Student answer sheets may contain confidential student information that is protected by FERPA. Make sure to delete or store the file in accordance with school policy.
Next Steps
Once the student answer sheets are scanned and uploaded successfully to PaperScorer, you are ready to begin grading.